ZStack Cloud provides two types of scheduled O&M resources: scheduled jobs and schedulers. These two types of resources are independent from each other. You can create schedulers and scheduled jobs based on different rules and associate or disassociate scheduled jobs with or from schedulers.
In the production environment, we recommend that you create a maximum of five snapshots for a volume and do not configure frequent scheduled snapshotting. Creating an excessive number of snapshots will lower I/O performance of VM instances or volumes, increase data security risks, and occupies the storage space of primary storage. To back up data for the long term, you can use Backup Service.
On the main menu of ZStack Cloud, choose . On the Scheduled Job page, click Create Scheduled Job. Then, the Create Scheduled Job page appears.
 Note:
Note: 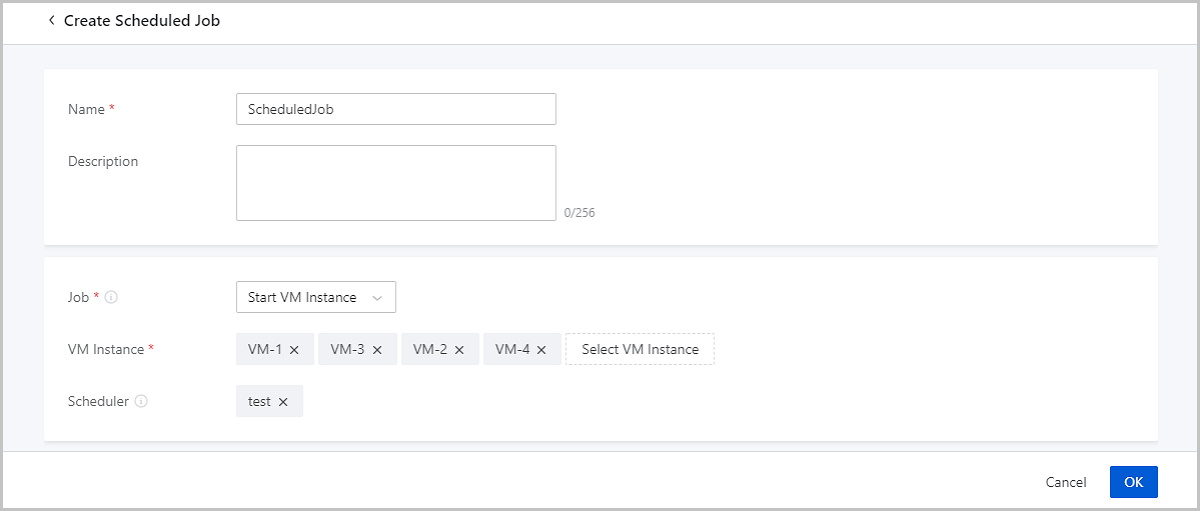
Email Us
contact@zstack.ioEmail Us
contact@zstack.ioThe download link is sent to your email address.
If you don't see it, check your spam folder, subscription folder, or AD folder. After receiving the email, click the URL to download the documentation.Thank you for using ZStack products and services.
Submit successfully.
We'll connect soon.Thank you for choosing ZStack products and services.

