You can create backup jobs to back up VM instances, volumes, and databases on your local data center to specified local storage servers and sync the backup data to specified remote backup servers or backup servers on the public cloud.
The following describes how to create backup jobs for local VM instances and volumes and the management node database.
On the main menu of ZStack Cloud, choose . Then the Backup Job page appears. On the page, choose . Then the Create Backup Job page appears.
The name must be 1-128 characters in length and can contain Chinese characters, letters, digits, hyphens (-), underscores (_), periods (.), parenthesis (), colons (:), and plus signs (+).
 Note: Note: Before you can sync backup data to a remote backup server, you need to add a remote backup server to the Cloud. Note that you can add only one remote backup server to the Cloud. Note: We recommend that you set a QoS based on your physical network environments and the concurrent number of implemented backup jobs.
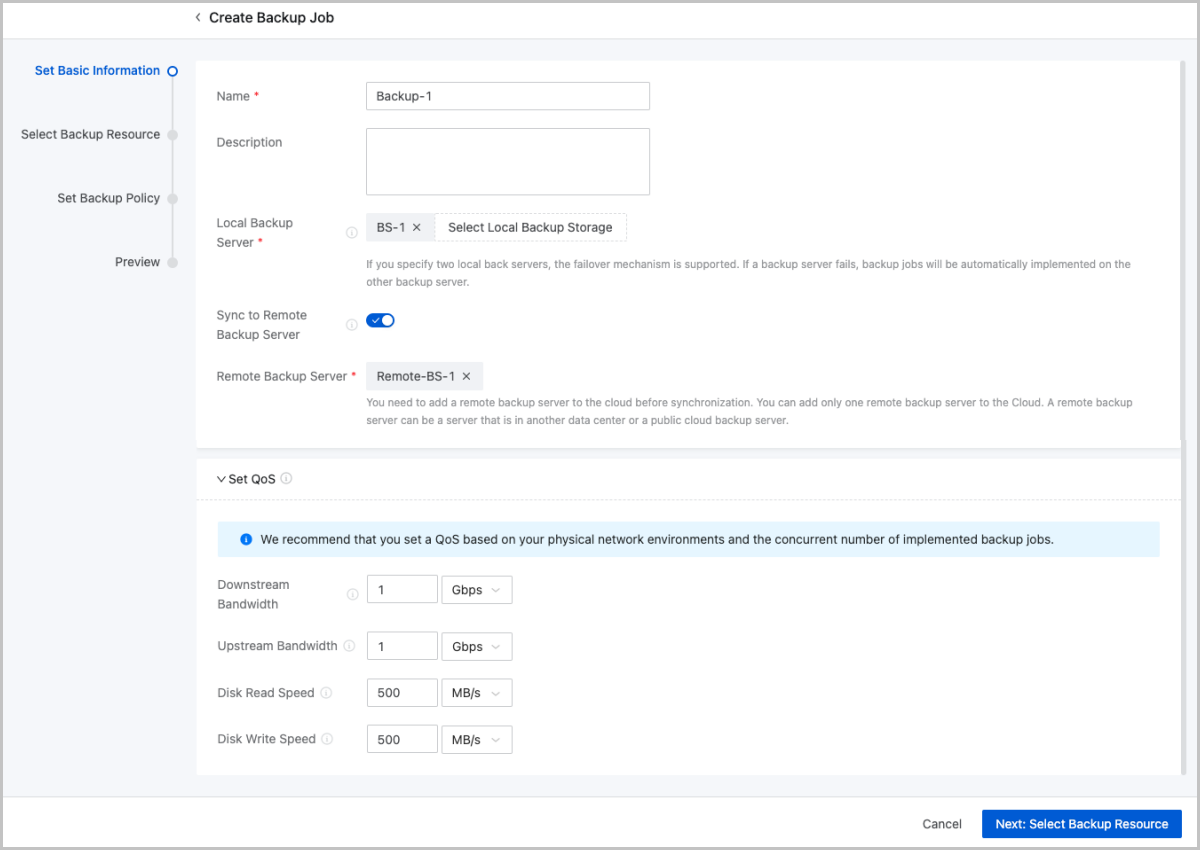
Select local VM instances or volumes that you need to back up.
Note: You can only back up VM instances in the running state.Note: You cannot back up shared volumes that are attached to a VM instance.Note: You can only back up volumes that are attached to VM instances in the running state.
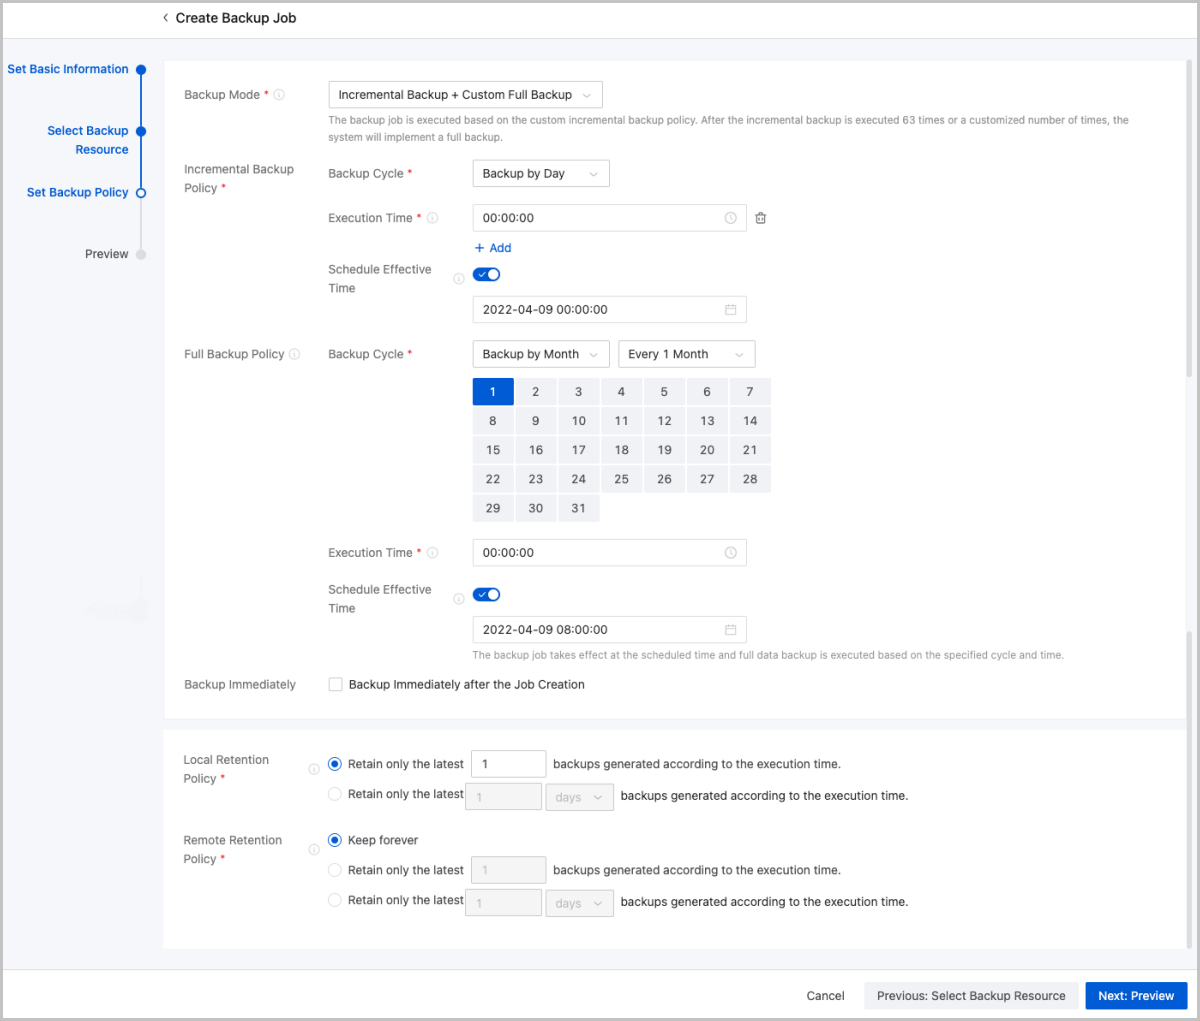
If you select Backup by Month, Backup by Week, or Backup by Day, you can set the backup execution time and schedule the effective time of the backup job to the accuracy of a second.
Note: If you set the execution time to the 31th day of each month, the incremental backup job is executed only in the month that has 31 days.If you specify data backup by month, week, or day, you can schedule the time when the backup job takes effect. After the backup job takes effect, data backup is executed based on the specified cycle and time.
Note: The minimum backup interval is 15 minutes.Note: You can retain a minimum of one backup of selected resources.If you select Backup by Month, Backup by Week, or Backup by Day, you can set the backup execution time and schedule the effective time of the backup job to the accuracy of a second.
Note: If you set the execution time to the 31th day of each month, the incremental backup job is executed only in the month that has 31 days.If you specify data backup by month, week, or day, you can schedule the time when the backup job takes effect. After the backup job takes effect, data backup is executed based on the specified cycle and time.
Note: The minimum backup interval is 15 minutes.Note: If you set the execution time to the 31th day of each month, the full backup job is executed only in the month that has 31 days.You can schedule the time at which the backup job takes effect. After the backup job takes effect, data backup is executed based on the specified cycle and time.
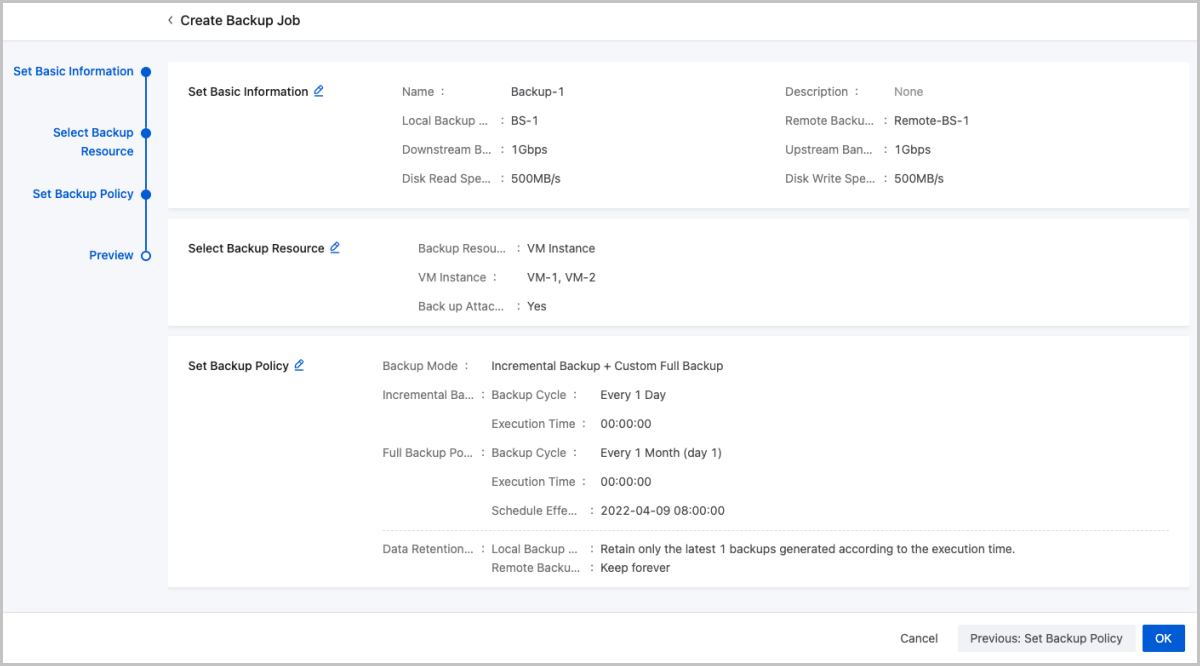
Preview the backup job. You can click the Edit icon to modify the job.
On the main menu of ZStack Cloud, choose . Then the Backup Job page appears. On the page, choose . Then the Create Backup Job page appears.
Note: Note: Before you can sync backup data to a remote backup server, you need to add a remote backup server to the Cloud. Note that you can add only one remote backup server to the Cloud. 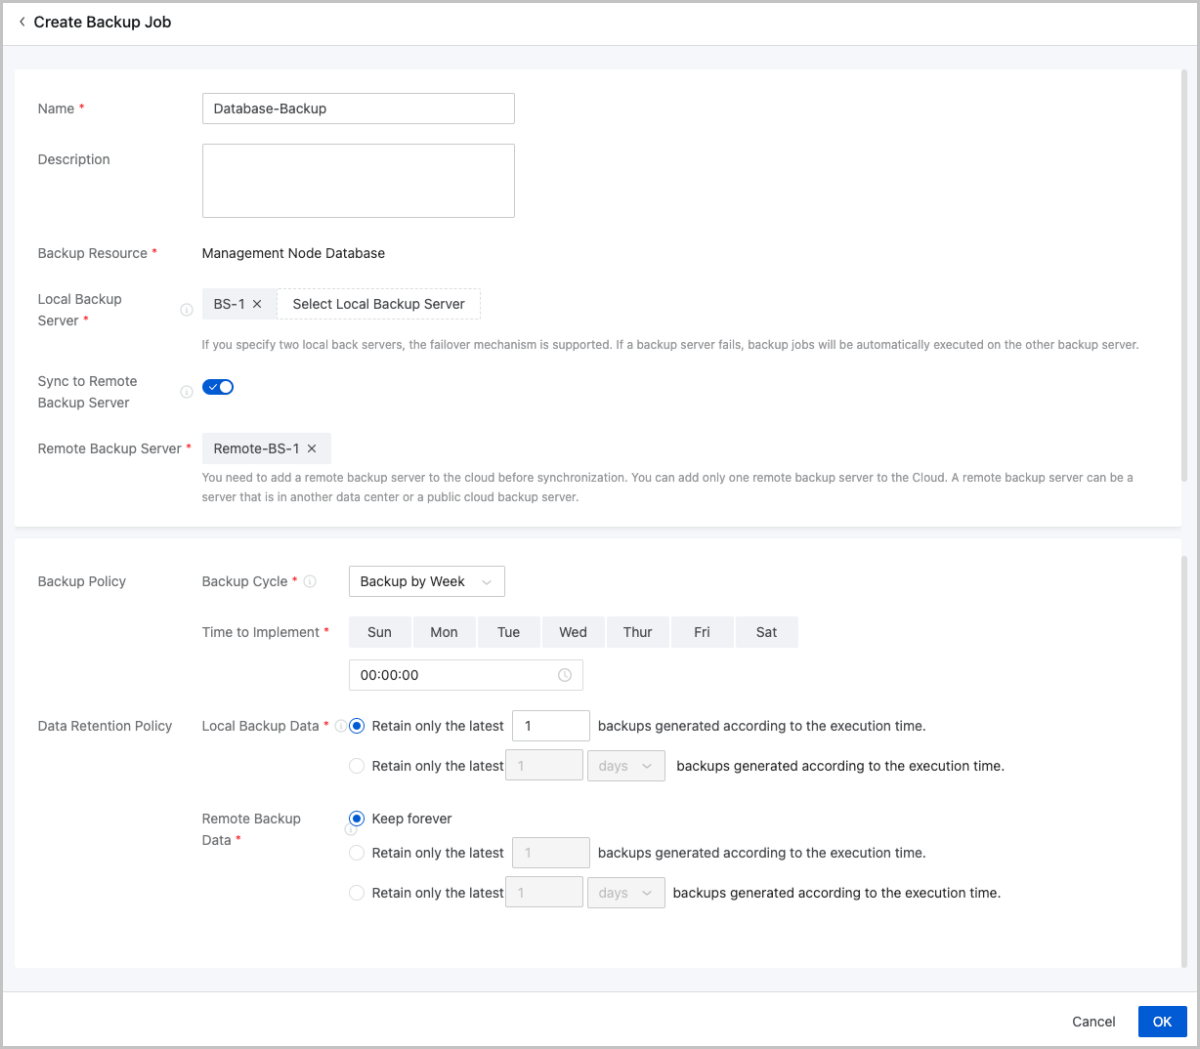 Note:
Note: incrementalBackup.maxNum is 64. This value indicates that the system implements a full backup when the incremental backup is executed 63 times. [root@localhost ~]# zstack-cli #Use zstack-cli
admin>>> LogInByAccount accountName=admin password=password # Log into the system.The default username and password combination is admin/password.
admin >>>UpdateGlobalConfig category=volumeBackup name=incrementalBackup.maxNum value=10 # Update the maximum times of incremental backup.
{
"inventory": {
"category": "volumeBackup",
"defaultValue": "64",
"description": "the maximum numbers of continuous incremental backup",
"name": "incrementalBackup.maxNum",
"value": "10"
},
"success": true
}On the main menu of ZStack Cloud, choose . Then the Backup Job page appears.
| Action | Description |
|---|---|
| Edit Backup Job | Edit the name and description of a backup job. |
| Enable Backup Job | Enable a backup job. |
| Disable Backup Job | Disable a backup job. If you disable a backup job, data backup will not be implemented for the associated resources. In addition, you cannot create new backup jobs for the resources. |
| Set Backup Policy | Update the backup policy of the backup job. You can edit the backup mode, backup retention policy, incremental backup policy, and full backup policy.Note: New backup policies do not affect backup jobs that have been triggered. |
| Set Backup Storage | Configure local backup servers and remote backup servers for the backup job. |
| Execute Now | Implementing a backup job right now will generate a new backup in the backup chain.Note:
|
| Delete Backup Job | Delete a backup job. If you delete a backup job, data backup is terminated for the associated resources. You can create new backup jobs for the resources.Note:
|
| Action | Description |
|---|---|
| Edit Backup Job | Edit the name and description of a backup job. |
| Enable Backup Job | Enable a backup job. |
| Disable Backup Job | Disable a backup job. If you disable a backup job, data backup will not be implemented for the associated resources. In addition, you cannot create new backup jobs for the resources. |
| Execute Now | Implementing a backup job right now will generate a new backup in the backup chain. |
| Delete Backup Job | Delete a backup job. If you delete a backup job, data backup is terminated for the associated resources. You can create new backup jobs for the resources.Note:
|
Email Us
contact@zstack.ioEmail Us
contact@zstack.ioThe download link is sent to your email address.
If you don't see it, check your spam folder, subscription folder, or AD folder. After receiving the email, click the URL to download the documentation.Thank you for using ZStack products and services.
Submit successfully.
We'll connect soon.Thank you for choosing ZStack products and services.

